Redefining Photography : A Tool for Visual Information Sharing

Why do you take pictures of the street?“, my friend asked me while our taxi was crawling Sudirman street, Jakarta, Indonesia. We were back to office after having a lunch in Kopi Nako, Senayan. She saw me taking pictures of anything during the short trip.

She didn’t know that capturing moment on the streets was already my habit for very long time. Also, she asked such questions because for her, capturing photos is a thing to be done during vacation or special events only. She, and many others do photography for two reasons only, which are

  1. documentation
  2. making an art

However, after plunging myself into photography world, I thought, we should no longer rely on just the two. There should be redefining photography. We should add one or two more functions and definition.

This is as a result of fast change in the world, especially camera technology. Now, camera is not only owned by rich people but has been a tool brought everyday by billions of people. The exclusivity of photography, due to high cost, it had doesn’t exist any longer.

Cameras become cheap since every smartphone has a camera. The processing photo cost is also getting less and less since it’s no need to make printed version just to see photo.

All can join photography if they want. No matter how hard some people try to maintain photography as exclusive for specific, the facts show that it has become a part of everybody life. Everybody takes photos every day. Millions of photos are produced daily.

Photography shouldn’t be defined or limited to common “the art or process of producing images by the action of radiant energy and especially light on a sensitive surface (such as film or an optical sensor)“.

By saying “art” in the definition, it makes photography so limited to exclusive people only, artists. Nowadays, everybody is an artist, which means, photography is no longer exclusive. People do it for many reasons and not just to create an art.

Currently, people use their cameras

  • for fun: selfie or we-fie are terms that are born not because people want to produce arts or to keep memories. They do these just for fun. The right definition for this purpose is “the fun way of producing images by the action of radiant energy and especially light on a sensitive surface (such as film or an optical sensor)s
  • visual information sharing: Have you ever take a photo of your works and then sent it to your superior? Street cleaners in Jakarta often do selfie or ask their colleague to take a photo of them and then send the photos to their office. What they do is never with art making intention, they just simply make a report to their superior and show that they are working. Photography in this case do information sharing.

Do you think the old definition of “the art” is suitable for those newly born purpose? I don’t think so.

That’s why I think, all language experts must try to find few other definitions of photography based on more updated situation of the world. The old one is already obsolete and can’t represent what happens in the real world.

So, they understand that nowadays, photography is not only for documenting anything or creating an art. It can be useful also to send information to other people, like I do when I post the photos into my blogs or Facebook accounts. I don’t intend to show an art or documentation but some information about a place in specific time.

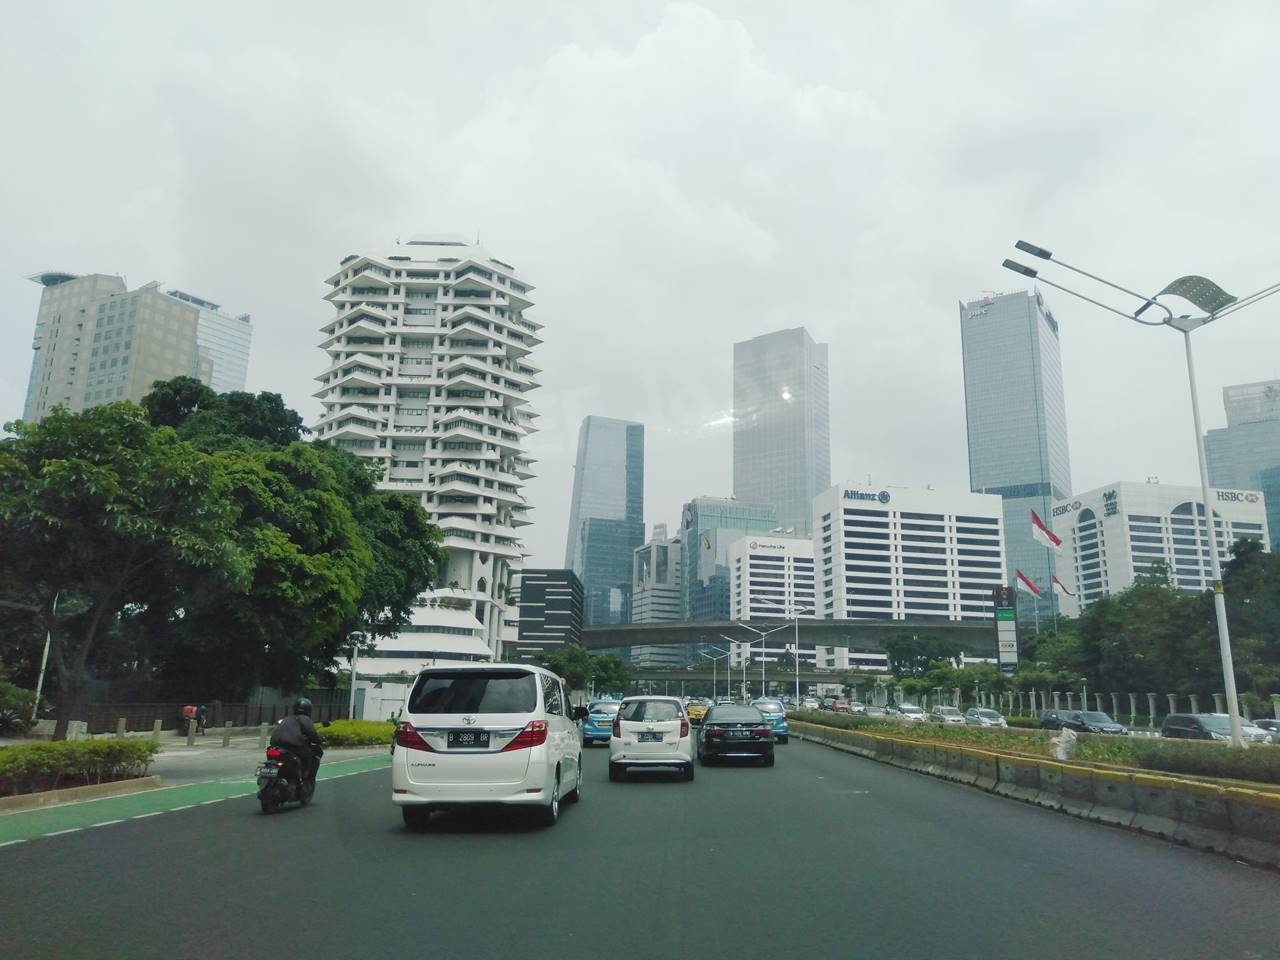
These are three pictures I took on 07 Desember 2022 on Sudirman Street, Jakarta, Indonesia. So, now you can see, short information of a place on the other corner of the world named Indonesia, Jakarta, at specific date. Not an art. Neither a documentation. My solely intention is to tell people a bit information about the city where I work.

Do you agree to have few other photography definitions? If so, can you provide one for this blog?

Never Underestimate! Here What You Can Practice Using Low-End Smartphone Camera

Low-end smartphone camera sucks. Poor censor makes the image resulted is never sharp. Its slow processor makes sure that whenever you try to capture moving object, you will have blurry photo. Don’t ask about the features which will limit whatever skill you have to the lowest level.

Yes, it sucks.

I can understand if you have such a feeling. My old OPPO A3s is in the category. I face such kind of situation many times.

However, at the same time, I feel lucky to have the gadget. It makes me a better photographer. I think my skill improved a lot after buying the smartphone.

The limitation provided with that low-end smartphone camera cornered me to focus only on one thing, photo composition.

I can’t use the camera to make bokeh or blurry background. The result was definitely laughable. It’s not possible also to do panning, or doing any creative technique as it’s near impossible with such poor censor and processor.

It forces me to think harder and more creatively to make attractive and interesting photos.

After quite lots of thinking, I found the only way is to rely on story making instead of showing the technical capability of mine.

To achieve this, I must make a photo composition that can tell a story to spectators. A story that relates to their life is stronger to attract their interest than any other factors in photography.

Never Underestimate, Here What You Can Practice With Low-End Smartphone Camera

With its limitation, my low-end camera has taught me several things, i.e.

  • to be more aware about the surrounding to find and object that can create a story so that I don’t have to rely on just beauty
  • to be more aware about colors and its combination as I can’t rely on the color of Oppo’s camera I have (which is quite dull)
  • to be close to the object as much as possible since its digital zoom is really terrible. I don’t want to get pixelized photo. This teaches me not to be lazy and the closest distance between me and the object tends to result on more emotional photo
  • I can focus on composing all objects inside photo frame without distraction of my desire to beautify the photo using bokeh or any other things. I can spare more time to make the story shown on the frame
  • to care more about lines and use more in the photo

An excuse for my inability to buy a new smartphone? Perhaps, many people will think that way, but honestly, I don’t give it a damn shit.

Because, as a semi professional photographer, I know well how important photo composition is. Even if you have a million dollars camera but you failed in creating a good composition, then your photo means nothing. Nobody will be attracted.

That’s why, even I hope that the time to replace my camera comes immediately, I can’t be more grateful for having this old OPPO. It has forced me focus on keep training one of the most important things in photography, which is composition.

Therefore, if you felt bad about your luck for having such cheap smartphone, I would suggest not to throw away that feeling immediately. Yes, of course, you can have such a feeling, I had that but don’t keep it too long.

Think positively. Your low-end smartphone is not as useless as you thought. It still can be used to practice one very important thing in photo making. As long as you are not lazy, you can keep practicing about how to create a photo that can tell spectators about a story than just only showing about beauty.

I am a better photographer now as I often use my old smartphone. It makes me understood more and more creative to find solution for the limitation my camera have.

You can also.

(all pictures in this posting are captured by my old OPPO smartphone)

Photo Composition : The Thing You Must Learn First

There is plenty of knowledge a one must have to become a good photographer. Not only about handling your camera, photo composition, shooting techniques, and many others, someone should learn before being able to create a good photo.

A lot and it may cause a beginner overwhelmed and confused about which one to be studied first.

There will be many answers with valid argument. However, I would strongly suggest anyone who has just begun to start with photo composition. Yes, rather than others, I think this is the most important thing and should be on your top list of what to learn as a beginner.

Why?

Let’s make it simple,

  • If you understand well about photo composition, even if you only have a low-end camera or smartphone camera, you still can produce a good photograph. People still can enjoy your photos as you know how to place a subject and combine it with background and other things inside a frame
  • Even, if you have a full frame, a high-end camera, but you don’t know how to place the subject or combine all factors in your frame, your photos will definitely not be nice to look at
My wish - a new smartphone with better camera, better lense and better feature
The photo of Setu Gede which was taken using a low end smartphone camera, OPPO A3s
A photo about mobile coffee shop in a corner of Jakarta, taken using old smartphone OPPO A3S

You can’t be a professional photographer if you only know about photo composition and don’t ever think it is enough. However, at least, your photo can be understood by your friends, family, colleagues, and closest friends.

If your photo composition skill is good, you can achieve this easily. At the same time, it can be your base to move forward.

You can also avoid Gear Acquisition Syndrome, a syndrome that make people think that a good photo can only be produced by the newest or expensive camera. It is because you know how a good photo is created which is by making a good composition of all factors inside a photo frame.

For learning photo composition, you don’t have to buy a new DSLR or Mirrorless Camera. Photo composition can be learned by using your current smartphone, which surely has a camera on it.

It can be also practiced anytime, anywhere, and using any objects.

What to learn in photo composition?

I believe you already know that internet has everything. You can find easily by using Google search to find the definition about photo composition. Google can provide you also with so many articles, that even can make you sick, about how to make good photo composition.

However, I would prefer to write in more simple way.

1/ please learn how to place a subject in a frame and you can start with learning how to use Rule of Thirds as a start

2/ please learn also a bit make your photo subject prominent in your photo, like by applying KISS (Keep It Simple, Stupid) principle

3/ please learn about color combination that may attract people attention, such as warm or cool colors

4/ please learn about how to avoid unwanted object from being captured (to be patience)

5/ please learn how to make photo sharp

6/ please learn about how to use natural lighting

If you have and even master these basic knowledges, not only it will be easier for you to step further and grow your skill, but your photos will be appreciated by your closest circle, at least. It will grow also your confident.


Until now, after years of being a semi professional photographer, I still train myself about composing a photo in any kind of situations, with any objects. I do this just by using my smartphone.

Therefore, I know many experts says to start with understanding basic photography theories, such as ISO, Shutter Speed, et cetera but I beg to differ. After, the very first step, which is reading your camera manual book (including your smartphone camera), you should start your photography life by learning about photo composition.

Of course, step by step as there are still lots of things in composing good photo.

So, this is my tought but you surely have your choice how you want to start.

Rule of Thirds : A Law That You Can Break

Rule of Thirds is an important basic technique of photography for creating a balanced photo composition. This principle is used in conjunction with the placement of Point of Interest (POI) or focus on a photo.

The application of the Rule of Thirds is carried out by using imaginary 2 vertical and 2 auxiliary horizontal lines which form 9 squares of the same size. This can be done by imagining in our head or with the help of Grid features on any nowadays digital camera.

The four lines will cross one another and produce 4 intersection points. The size of the resulting square and the position of the point of intersection will vary depending on the used ratio aspect.

The application of the “rule” can be described using below illustration.

Illustration 1 : (aspect ratio 1:1)

Illustration 2 : (aspect ratio 4:3)

You can see the cross section differs on both aspect ratios,

Why use the Rule of Thirds?

First:

It’s actually funny because this fact is not known by many people, but it turns out that according to a study, the human eye will naturally move towards certain points when looking.

The human eye will try to find POIs before sending them to the brain for processing. And, according to the same study, the natural movement of the eye a flat field follows the path of lines.

The four intersection points are the starting points where the human eye will focus for the first time.

The concept of the rule of thirds is based on this study. This will help the eyes of someone looking at a photo to be able to comfortably move along a natural path and at the same time find a focal point, the essence of a photo.

Second:

Compared to placing a photo subject in the middle, using the rule of thirds actually makes a photo more balanced and interesting.

In a photo, there should be a subject that become the core of the “story”, the focus, the thing a photographer wants the spectator to look at and a background.

The common way to place the subject in the center tends to make most of the background appear cut off.

By using the “rule of thirds”, most of the background will still be visible and tell a “story” of its own.

The photo will become more balanced, the subject stands out and the background supports it to make a complete story.

Third:

The rule of thirds helps a photo to have a clear and prominent main role, as well as easy-to-find points of interest.

For example, in the photo “sales girl” above, which was taken on Jalan Suryakencana, Bogor during the Cap Go Meh Bogor 2016, it will be easy to find what the subject and main focus is, the girl.

The eyes of anyone who see it will be immediately led to the more important part, the beauty of the girl.

Fourth:

Proven! Although, not all attractive photos use this rule of thirds, the majority of photos that manage to catch the eye are taken using this technique as a basis.

Therefore, the majority of photographers or photography enthusiasts will try to train themselves and apply them when taking pictures.

How to Apply the Rule of Thirds When Taking a Photograph?

Applying the rule of thirds in taking photos is not difficult. You just need to pay attention to a few things, such as

  • Horizontal line
  • Vertical Line
  • /Intersection or Cut Point between lines

Horizontal Line :

This horizontal line can be used

1/ to ensure that the horizon line remains straight and keep the photo straight.

2/ As a guide where to place the horizon line. As much as possible the horizon is placed as closest as possible to one of the two existing horizontal lines.

Vertical Line : The vertical line is a benchmark where the subject should be positioned.

Cut Point is the place where the point of interest, the most interesting or attractive part is located. As in the photo of the salesgirl, where the face is the focus, the placement of this POI is close to the point of intersection.

Rule of Thirds - A Law That You Can Break

Rules of Thirds for all objects

This principle applies not only to human and animal objects. This concept can also be applied to all type objects, in the form.

Tools to apply rule of thirds for camera shooting

Today’s digital cameras are usually equipped with a feature based on the rule of thirds. In fact, even a smartphone camera has this function. However, it’s not called as rule of thirds feature but named as GRID or LINES.

If you don’t like to see line in your camera LCD monitor, you can use your imagination to draw horizontal and vertical lines in your mind.

An experienced photographer often does not activate the GRID feature. They are usually used to placing objects in positions taught by this concept. Whenever they see interesting object, automatically, their brain draws lines and start to think where to place the subject.

Rule of thirds can be violated!

Photography is closer to an art than to an exact science. Therefore, almost all theories or rules in it are not absolute. It is more like a suggestion and not coercion.

Everybody is free to use or not.

If someone, according to his tastes and views, thinks using this concept will actually produce the desired results, then they may ignore it. Nobody will punish you, especially if the taken photo is stunning.

So, there is no obligation to always use it. Besides, a photographer should rely on their intuition more than just strictly following any theories.

You should try this rule. I did it and it helps a lot in my development as a photographer.

Keep Your Photo Straight When Taking Pictures at Beach

Beach is one of the most popular sites for taking pictures. Everybody loves beaches. It provides many things that can make stunning landscape photos, such as line, color, light, and plenty of open space.

Unfortunately, seeing so many pictures taken by neighbor, friends, or colleagues, many times it’s ruined by a simple mistake, a very basic error that isn’t even related with technique. Many failed to keep their photo straight. The photos look tilt to one side, either left or right.

One of the examples is like below (this was taken by me)

Image

The sea looks like pouring its water out of the frame and the photo force whoever see it to tilt their head to the left. The photo is simply skewed and unsightly to look at.

Many photo I found is like this.

Compared to the photo at the top and below this paragraph, you surely can feel the difference. I believe you will agree that the two are better.

Keep Your Photo Straight When Taking Picture at Beach 2

So, that’s why whenever you want to capture a moment in a beach, one of the most important things is to keep your picture straight.

To do this, there are several ways and even with smartphone camera, you can do this.

1/ Please pay attention on the horizon line before pushing the shutter release button. Give a few milliseconds for your eyes to check if the horizontal line is already straight. If not, please correct it

2/ Use the grid feature in your camera. Most of digital camera on your handphone has this feature and you should just activate it. The grid line is made following the basic photography technique called as “Rule of Thirds”

3/ Find three or structure that your eyes can use as benchmark. A building, hotel, may serve best for this purpose as they have symmetrical lines.

Very simple, am I right? Also, a very small, even tiny thing which many people overlooked but please remember that it can be decisive.

Please remember that photography is about combining many factors in a small frame. One tiny mistake can ruin everything. It’s better to take a bit more time than to have disappointing result.

I have tilted photos, what to do?

People make mistakes every time, me included as all of us are only human after all. Mistake is a middle name for us.

If you have tilted photos, don’t dispose them yet. In this digital era, there are lots of photo free editing software to correct tilted photos.

You can use Snapseed (for smartphone) or Photoscape (for desktop). Both have feature to make the tilted photo straight in no time. In Snapseed, you just need to push “rotate” menu and the software will repair the photo for you. In Photoscape, you need to do a bit more by using grid line provided.

However, I prefer to make sure my photo straight when taking pictures because the software will do cropping. This means, parts of photo will be cut and erased.

So, please bear in mind this simple thing whenever you play at beach and want to take a picture of your beloved one. I believe you don’t want your girlfriend or boyfriend shows sour face when they find their photos tilted.